The foss-north event due a few days ago got cancelled due to health issues, but I’m happy to announce that I’m back and that the planning for foss-north 2020 already is on.
The event will be run as last year, meaning one community day, two conference days and one training day. The community day will be on March 29, conference march 30-31 and training on April 1.
Last year we attracted some 100+ people for the community day and 250+ people during the conference (260 tickets sold). My personal goal for 2020 is 400 visitors (we can do it!) and 200 people during the community day. Also, let’s find a bigger place for the social event ;-)
I just sent out the first sponsorship request to our old sponsors and am happy to see that we already have one sponsor lined up. I have a feeling that this will be a great year.
Now I decided to start shifting away from gmail. And I’ve been a gmail user since uni’. That is 15+ years, probably closer to 20.
I’ve also been a fond user of the send-as-another-email setup, basically living of mail forwards from various domains and using gmail as the all mighty source and destination for all mails (which enables great confusion when you pick the wrong identity). Well – no more of this (once my alternative setup is in place).
I’ve chosen to use fripost‘s services. The allow all that I want – custom domains, aliases, and so on, while doing this in a privacy based setup. The organization is an association rather than a normal company. This means that most of the work is done on voluntary basis. But, man, they are a helpful, friendly and skilled bunch. Right now we’re discussing SPF and DKIM setup, while I’m uncomfortably am fumbling around with DNS records. It will be great once I’m done.
And if I don’t reply to mail – I’m on vacation for a week, while moving to a new mail provides, so do resend that mail if I missed it ;-)
I spent yesterday *finally* setting up a NextCloud instance of my own. It’s been on my todo since I installed fiber at home and got a decent Internet connection.
I started out with Rasbian Lite and combined it with the NextCloudPi install script from ownyourbits. I then used certbot to install certificates from let’s encrypt before migrating the data directory using these instructions.
After that it was happy account creation time, before realizing that I could not upload files larger than ~10kB. Very annoying.
After having duckduck-ed and browser issues and articles for hours, I finally found that that the /etc/php/7.3/fpm/php.ini file contained a reference to the data directory.
sys_temp_dir = /new/path/to/data/tmp
This one-liner cost me about four hours to find, so hopefully this post saves someone else that time.
It is time for another installment of Godot (previous entries: introduction, 2D). This time, I have dived into the world of 3D. The goal is to recreate parts of an old time favorite: Kosmonaut. Something I remember playing a lot on my dad’s 286 with amazing EGA graphics.
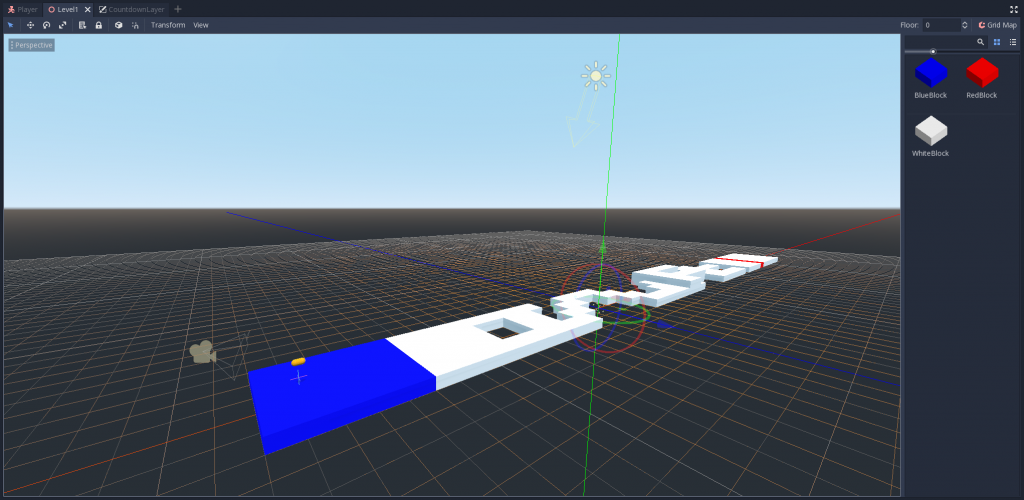
The state of the game when writing can be seen in the short screen capture below. This is more of a tech demo status than a full game at the moment, but I hope you will still find it interesting. You can also get the complete source code.
The project is split into two major parts: the Player and the World. Each of these contain scripts that I will refer to below. But first I want to talk about how to create 3D scenes.
Of course every scene can be created manually from individual elements. However, in 2D games it is common to use tiles to create large worlds from common elements. Godot’s analog in the 3D world is the GridMap.
A grid map is more or less a 3D tile map. Inside each tile (or cell, or whatever you call them in 3D) you can place an item. The way you create these items in Godot is to place each 3D element in a scene and then convert it to a mesh library. Then you can draw your 3D scene much like you can draw a 2D scene from tiles.
Once we have a world with a track (the grid map), we add a player to the scene (the yellow blob in the image above – I need to learn Blender to create a proper ship). The player scene contains the ship – and the camera. This means that the camera follows the player automatically – very convenient.
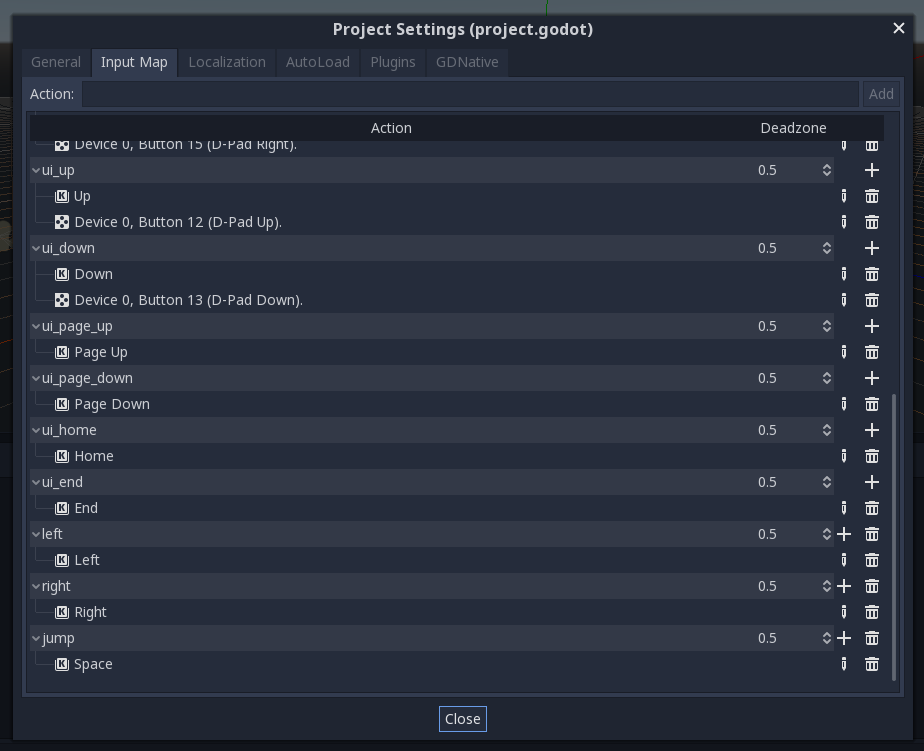
The player script is responsible for this ship’s movements based on user input. Inputs can either be pressed for a long time, used for sideways movement, or just tapped (i.e. the release is ignored), used for jumping. Each of the inputs are mapped to a keyboard key (or other input device) in the Project Settings dialog, under the Input Map tab. This feels a bit awkward to me and makes me lose the feeling of flow – but I don’t know how to do it better.
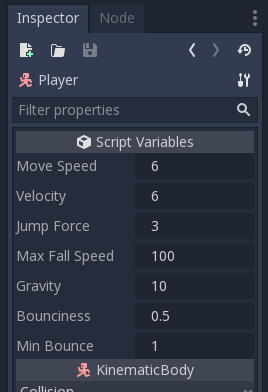
Getting gravity, jumping and bouncing to work was fun. It reminded me of coding games on my Atari ST. The character controller code is really basic, but can become super complex if one does not think through the order of the things you do. I ended up exporting some tunables so that they can be adjusted in the editor, just to figure out how high to jump and how fast to run the ship.
Figuring out crashes was easier than expected. Through the KinematicCollision objects retrieved using get_slide_collision, the normal of the surface collided with can be retrieved. From there on, it is easy to determine if the ship is sliding along a wall, or just hit it head on. The latter is deadly and the crash signal is emitted.
The crash signal leads to the world script. Here we handle the second death scenario – falling. This is a handled by the world, rather than the player, as the world knows what the lowest possible y value is.
The world also refers to two invisible scene elements used to mark the starting position ($StartPosition) and goal position ($GoalPosition). The first is used when resetting the player, while the latter is used to determine when the goal has been reached (duh).
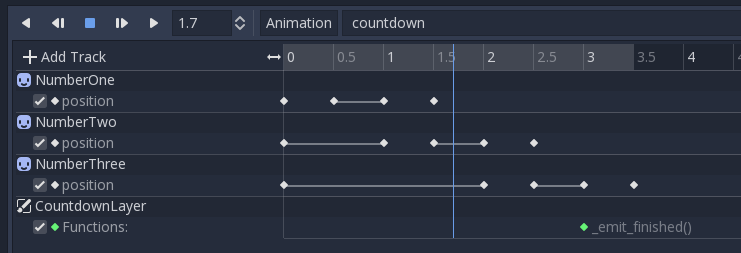
When starting a run – or restarting for the millionth time, and when completing a track, a short sequence is shown. These sequences are realized using a CanvasLayer, Sprites and an AnimationPlayer. The canvas layer allows us to add 2D contents on top of (and behind) a 3D (or 2D) scene. Each such layer is broken into a scene of its own that encapsulates one sequence. Each scene have a small script interface with a play function and a finished signal.
When showing a sequence from the main world script, the script is started and then the calling function yields until the finished signal is emitted, as exemplified here. Very convenient!
One more word about the sequences: the animation player is a really convenient way to control all properties of a scene using key frames. It can even be used to call functions. I really like this.
On a side note, I found my first Godot docs bug when writing this post. The pull request is right here ;-)
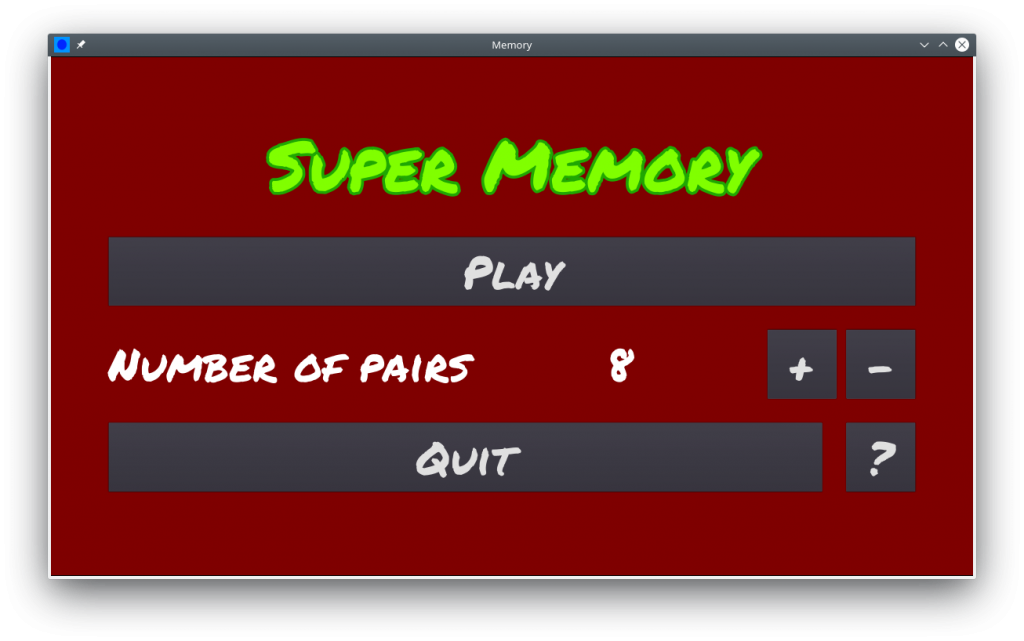
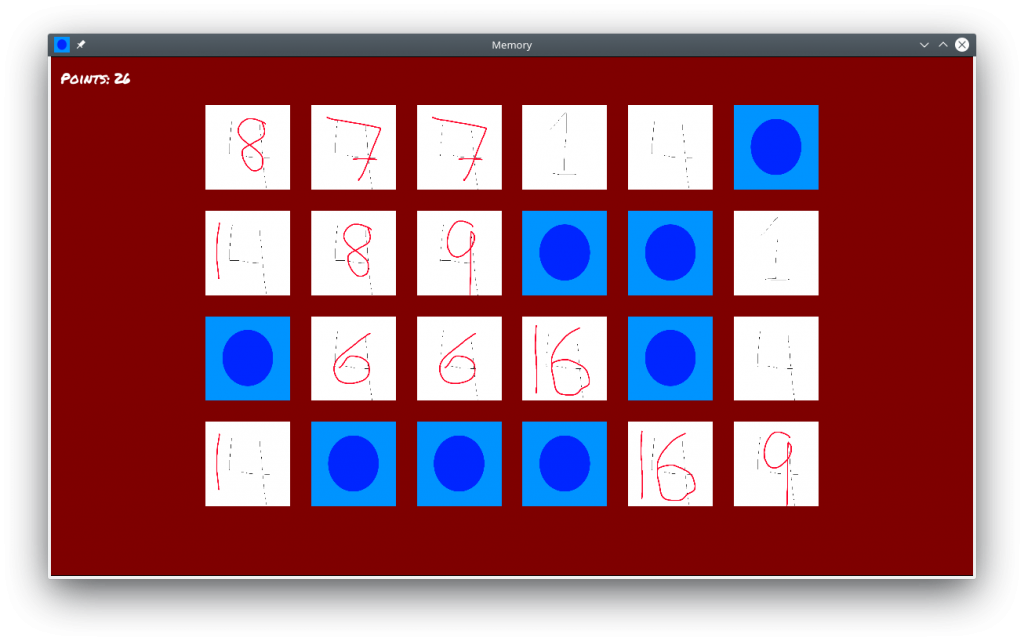
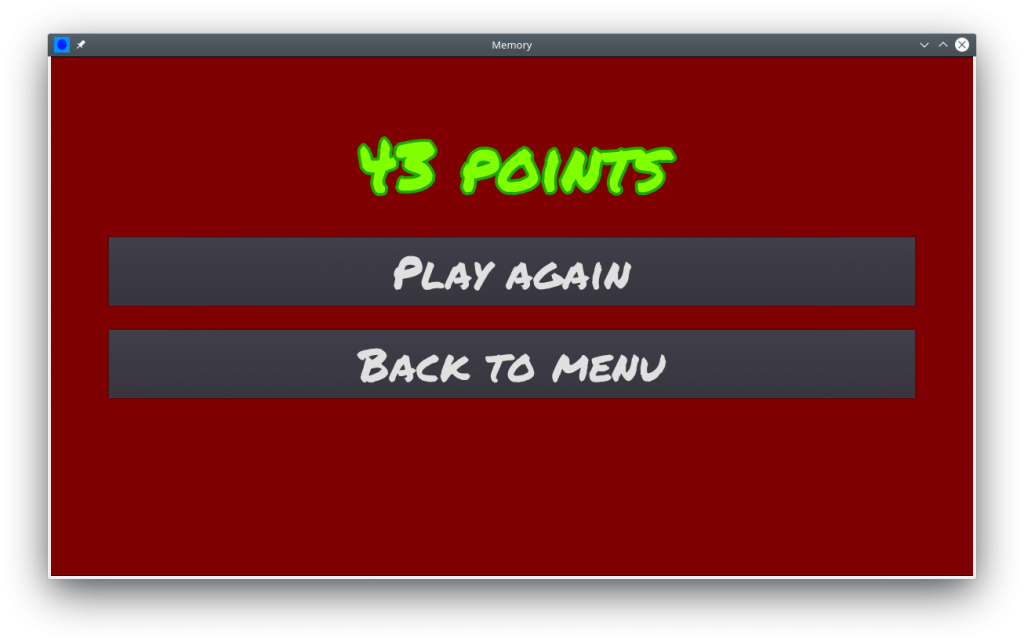
As mentioned, I’ve started using Godot to create some games with my kids. We decided to start with something simple, so we created Super Memory. I’m still waiting for a graphics delivery, so right now the you play with “dad’s placeholder cards”. They aren’t pretty – but they get the job done.
I had three major goals when creating this game:
Teaching the kids basic programming logic – how to think like a machine.
Teaching myself a bit about Godot.
Creating a game that I can push all the way to Google Play.
The first two items are done – for the third I’m still waiting for the graphics delivery. Kids are such lazy team members ;-)
When it comes to the game logic, I decided to push it all into the entry point of the game: the table scene. The main parts are in the init_game function and the _on_card_flipped function. I would consider the rest of the code support functions, or GUI driving functions.
This brings me to the GUI parts. I’m still not convinced that I understand how to properly layout stuff using Godot, but at least it looks ok now – at the cost of some fixed element sizes and such. I need to spend some more time to really understand how the anchoring and stretching really works. I guess I have a hard time wrapping my head around it as the approach is different from what I’m used to from Qt.
Looking at the rest of the code, I’ve tried to make all the other scenes (in Godot, everything is a scene) like independent elements. For instance, the card scene has a face, and an is_flipped state. It can also signal when it is being flipped and clicked. Notice that the click results in a signal that goes to the table scene, which decides if the card needs to be flipped or not.
The same goes for the GUI parts. They simple signal what was clicked and the table scene reacts. There are some variables too, e.g. the number of pairs setting in the main menu, and the points in the views where that is visible.
All in all, the code is quite messy. I’m getting used to GDScript, so parts of the code has static typing information, while others don’t. Also, naming and underscore prefixing is a bit random. I’m also a bit unsure about the onready var pattern to hold references to various scene elements vs hard coding the reference. And one more thing – some parts are in Swedish before it all shifted to English.
At the moment, I have built installers for all desktop platforms and tried them. I’ve also setup an Android toolchain and pushed development builds to a couple of phones. This also works beautifully. Next step is to get the graphics delivery and push something to Google Play. I will keep you posted.
I guess it is quite common to start the path towards programming by making games. I started with a simple guess the number on my dad’s zx81 back in the day. He must have written most of it, but I felt proud of the result, so I will claim that it was mine.
I’ve experimented with various ways to get my kids into programming. Everything from board games, online resources, scratch, building shitty robots, and so on. They get it, but it is hard to move on from the basics to being able to start from a clean sheet of paper and create something.
During the summer, I decided to look into the various options and tried using Unity and Godot. After a couple of experiments, I settled on using Godot. Partly because of its open nature, but also because as a tool, it does the job I need it to do just as well as Unity.
From my perspective, Godot is interesting, as it is a tool that is based around a visual editor. You do write code, but you add the code to the visual model, and not the other way around. This is somewhat backwards to me, as I come from a Qt background, but I’m positively surprised over how well it works.
Another positive surprise to me is that Godot also comes with export presets. These are pre-built run-time environments for common targets such as Windows, Linux/X11, Android, iOS, HTML5. Using these, it is trivial to cross compile and distribute your project – from any platform, to any platform. Very convenient. You can even build your own export presets.
When it comes to the not-so-good, Godot comes with its own language, GDScript. It does the job, and I quite enjoy working it it. You can use VisalScript as well, or C# with external tooling – you can also use GDNative to interface with the engine using your language of choice, but that is less straight forward. I do understand that there is some history that explains the choices, but to me it does feel like Python, without the huge library of Python libs.
Next up, I’ll blog about some of the games I’ve made, so prepare yourself for boardgames, classic game remakes as well as my humble experiments into VR.