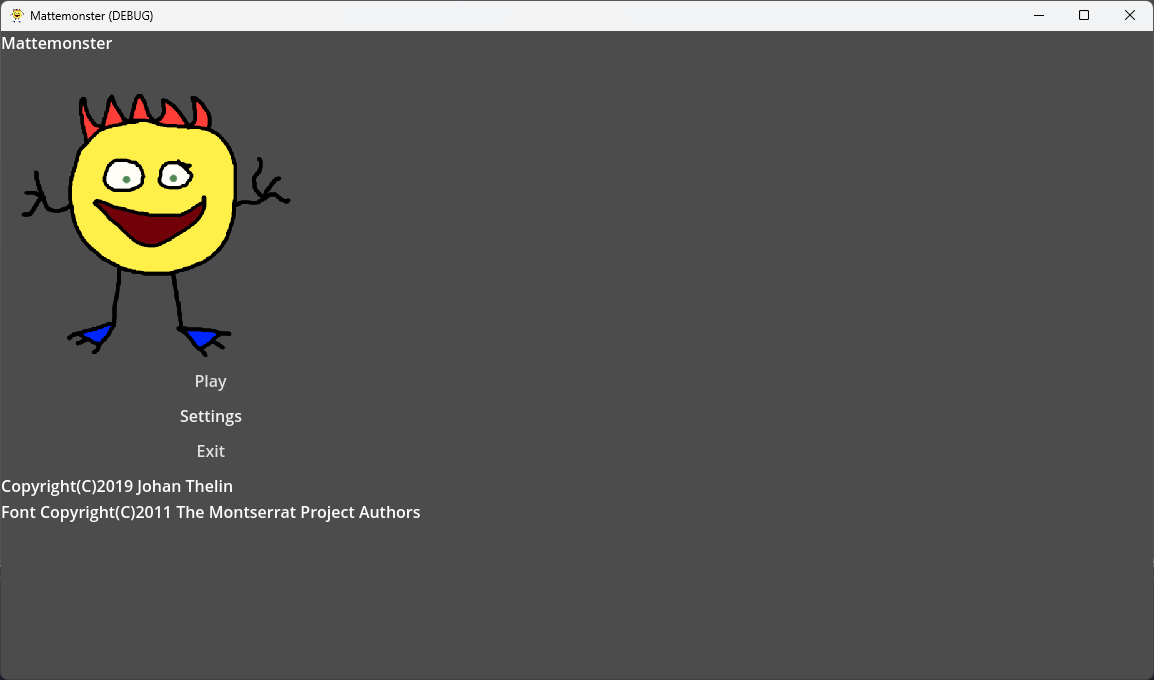
I just took the time to start porting the epic Mattemonster app to Godot 4.1, as Google thinks it is getting a bit too old.
You can tell that the Godot developers have done a stellar job. Up until now I’ve just fiddled with Godot 4, so I haven’t really done anything proper in it – until today.
The main porting task was to change to an object driven approach to signals, rather than the old string-based on. Great – because it catches so much more early on. The only tricky part here was that in order to pass along arguments with a signal I had to use the bind function. That was not really what the error message complained about :-)
Also, I had to re-add the translations into the project settings, and to handle some messages from the window manager differently (close and quit). I’m still not sure I got the latter right…
Now, all that is left is the UI styling, so I guess I know what I will be doing in the rain this evening…
It is busy days at the moment – but in a positive way.
First of all – a huge thanks to everyone who submitted to the Call for Papers for foss-north 2020. We have over 70 hours (!!!) of contents to squeeze into two tracks over two days. As always, it will be hard to pick the speakers to create the very best program.
Other foss-north activities includes starting to populate the community day activities, as well as getting a whole bunch on sponsors onboard. An extra big thanks to Luxoft and Red Hat Ansible for helping us by picking up the Gold Sponsorship packages. Ansible are even running their European Contributor Summit as a part of the foss-north Community Day together with events by KDE, Gnome, FreeBSD, Debian, and a hardware hacking workshop. I’m really looking forward to this – if you want to join in with your own project, workshop, hackaton, etc – just ping me!
The other big foss-north change for this year is that we are finally abandoning Eventbrite for a self-hosted system. Big thanks to Magnus Hagander helping us getting the pgeu-system up and running. At the moment, we offer login via Github and Google OAUTH. We’re looking into setting up a self-hosted OAUTH service as well, to let you log in locally, but that will not happen for the 2020 event due to time reasons.
Closer in time is the next local foss-gbg meetup. We are running an event around React together with our good friends at Edument. We already have 50+ registered attendees, so it will be fun!
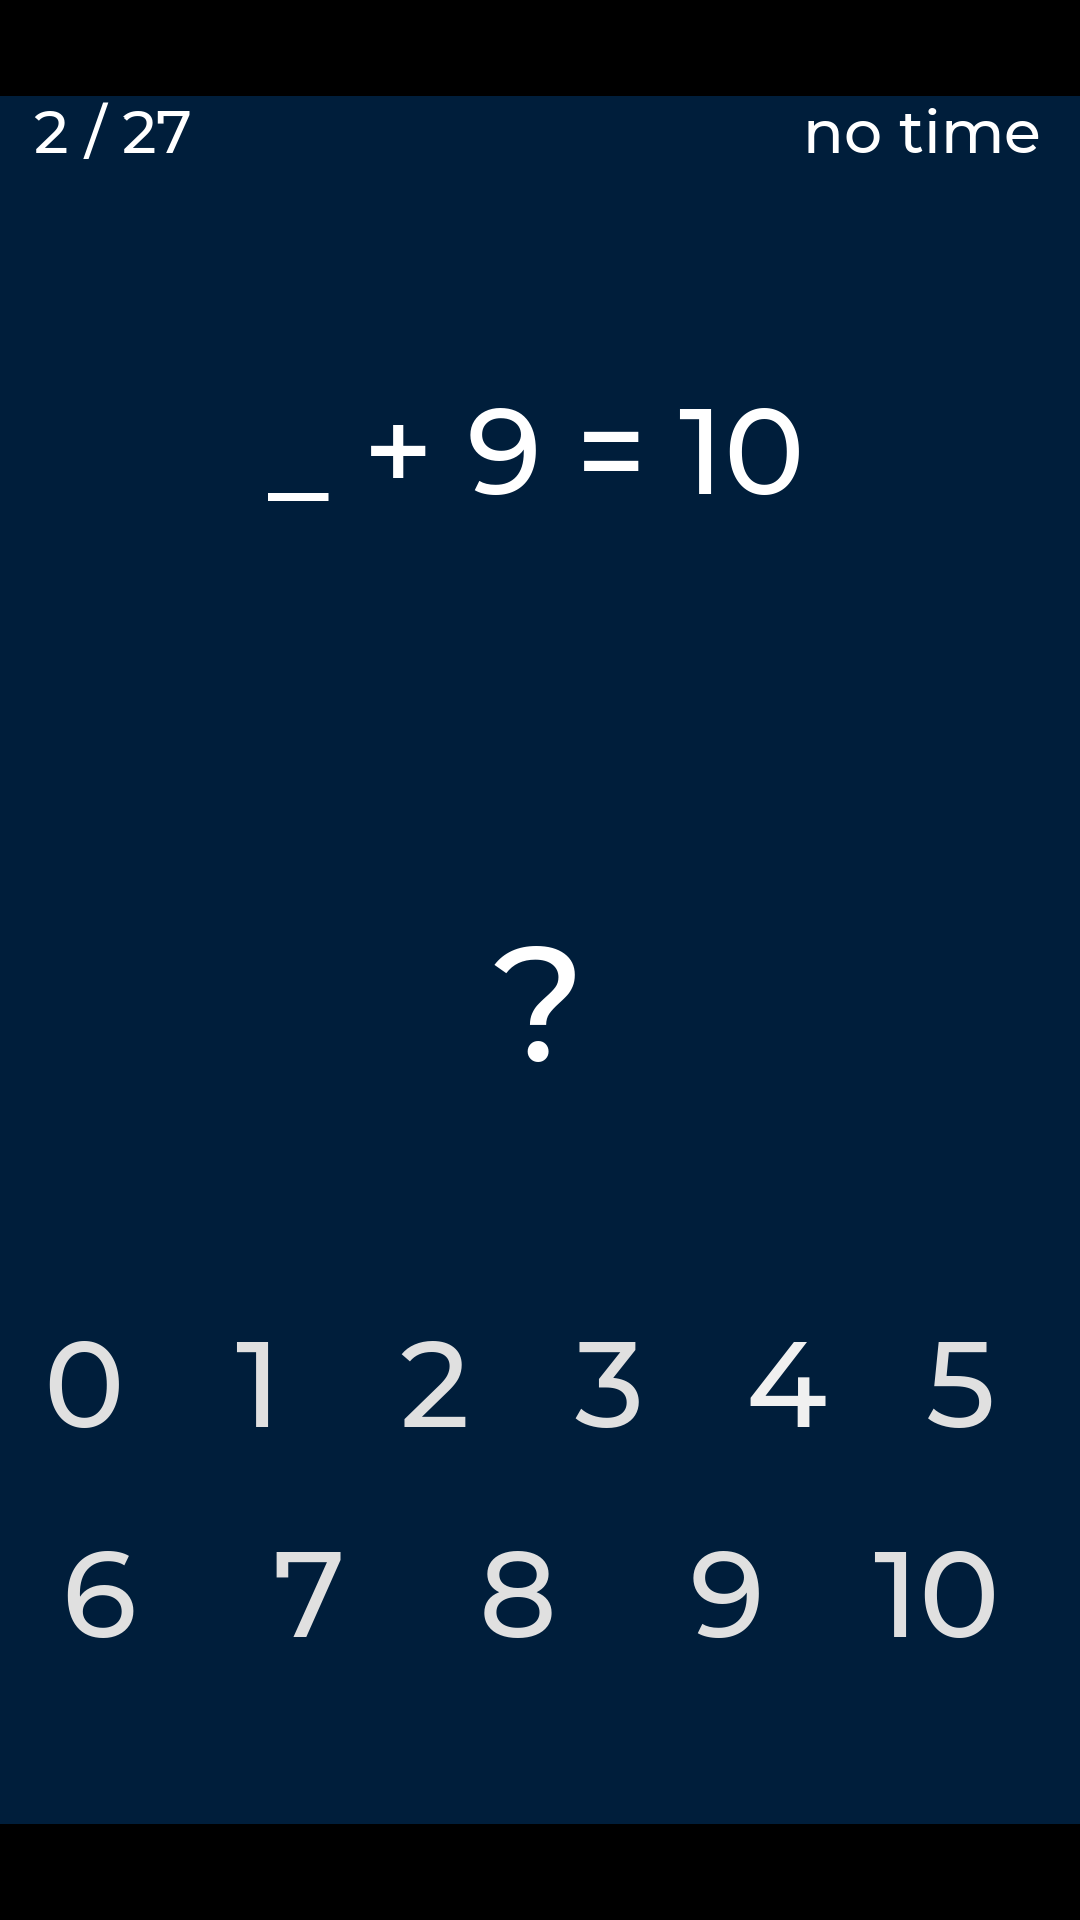
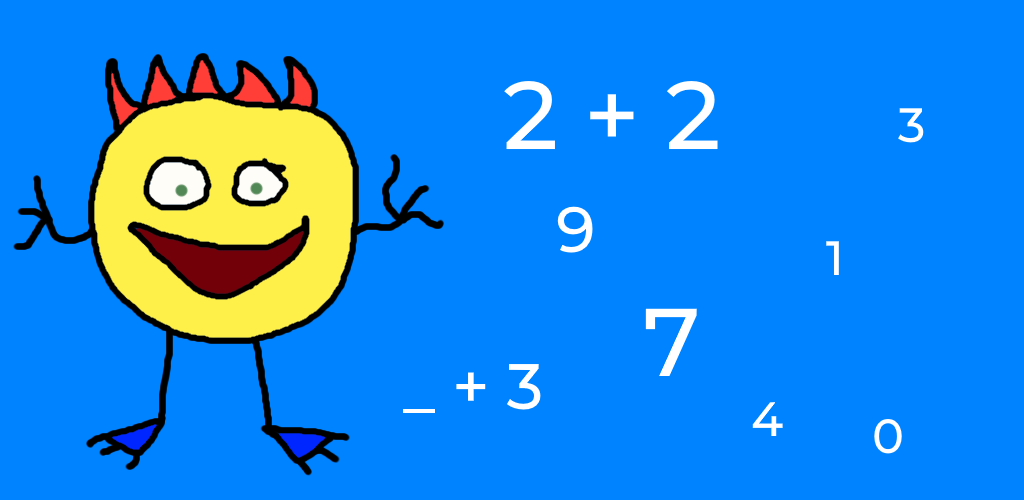
In other news – I’ve also released Ordmonster – if anyone has kids who wants to get started reading. This is a complement to the Mattemonster app for basic maths launched earlier. Both are made with Godot, a tool that I enjoy more and more.
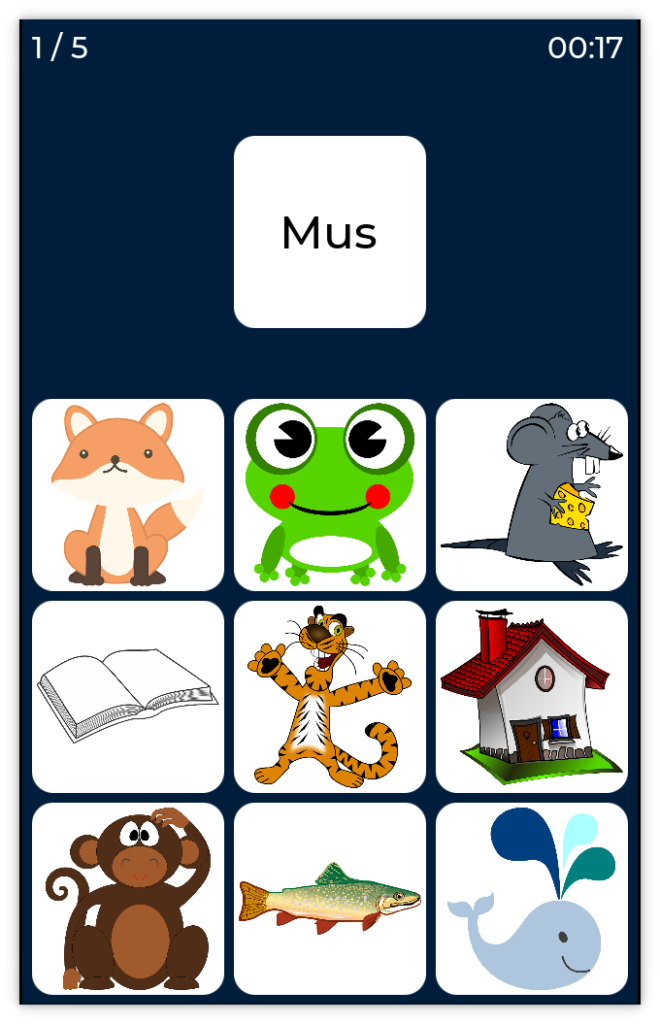
Spurred on by the mattemonster (maths monsters – it is available in English and Swedish) app that I created to make my sons homework a bit more exciting (everything is more exciting on a screen), I’ve decided to create another app. This time it is about basic reading and words. The title is ordmonster – swedish for word monsters. As this is work in progress, you can find it on my github. I’ll try to get the alpha play store listing done this week – but with fosdem coming up, I might run out of time.
The game can be run in two different modes – one word / many pictures, or one picture / many words. You can also select if you want four or nine items of the many category. Turns out nine images or four words seems ok. Right now reading nine words is a bit too tedious.
The first thing I’d like to point out that my fluency in Godot as a tool is starting to show of. I’m more happy with the code structure of ordmonster, and I start to feel that I don’t continuously bump into the sharp edges of Godot, but use the engine as it was meant to be used.
I also learned a couple of things. The first one is the Control::mouse_filter property. The GameButton nodes (the ones showing a word or a picture) consists of a Button with a Label for text and a TextureRect for holding the picture. The TextureRect sits inside a MarginContainer. It turns out the MarginContainer stops all mouse events from passing through, effectively disabling the Button. This took a while to figure out.
The second half has to do with how resource files can be traversed on Android. Resources are embedded into the executable produced by Godot. The words available in the game are stored as the filenames of the images, so that I don’t have to create a table and keep it in sync with the file names. Really smart idea – right? This smart idea cost me quite some time.
First up, it seems like you cannot have non-ASCII characters in asset filenames when building apk files for Android devices. Really annoying. The fix was using English for the filenames and having to add the words to my translation tables, so now I have a table to keep in sync with the filenames anyway.
The fun did not end here. Now it worked on desktop (both Linux and Windows), but my Android builds simply crashed on me. It turns out that the Directory::list_dir_begin and friends do not seem to work on Android, or the assets are not included in the apk. I’ll spend some time figuring out what is up, then I’ll probably file a bug report. In the mean time you can follow the current forum discussion. The code in question, including my Android hack (yet another list – sigh) is shown below:
func _init() -> void:
  if OS.get_name() == "Android":
    # TODO This is a really ugly HACK
    _words = ["ant", "apple", ... , "zebra"]
  else:
    var dir = Directory.new()
    if dir.open("res://assets/images/words") == OK:
      dir.list_dir_begin()
      var filename = dir.get_next()
      while (filename != ""):
        if filename.ends_with(".png"):
          _words.append(filename.left(filename.length()-4))
        filename = dir.get_next()
When working with internationalization of Godot apps, I really miss the Qt tools for extracting text needing translation. lrelease/lupdate – please come back, I forgive you and regret all my harsh words!
In other news, next week if fosdem. I’ll be there, so make sure to let me know if you want to meet and greet. Drop a mail at hello -at- e8johan.se, or ping me on twitter or mastodon.
Also, foss-north is approaching. The Call for Paper is still open – closing soon. Make sure to mark the dates March 29-31 in your calendar. Ticket sales will open soon.
I’ve finally come to a point where I have a project that is useful, and at a good enough quality (anyone with graphics skills who wants to help?) to be shared with the broader world: Mattemonster. What I’m trying to say is that I just went through the process of publishing a Godot app to the Google Play store.
There is already good documentation for how you export a Godot app for Android, and detailed guides how to publish to Google Play. This blog is not a step by step tutorial, but instead mentioning some of the things I learned or noticed.
First of all, when setting up the Android tooling, you usually have an android-tools package for your distro. This way, you don’t have to install Android Studio provided by Google.
The configuration settings that you use to export your app goes into the export_presets.cfg file. Once you put the details for your release key in, you should avoid storing this file in a public git, as it contains sensitive data. But even before then, it contains paths that are local to your machine, so I would recommend not storing it in a public git anyway, as it makes merging with others painful.
Finally, when building your apk file, a funny detail is that the switch to control if it is a debug or release build is found in the actual Save As… dialog, and not in the export settings. This was initially confusing to me, as I was looking in the wrong place.
The next step is Google Play. Here one creates all the accounts and listings as explained in the article linked to in the beginning of this blog. What is a bit unclear is that some settings are only available once an initial apk has been uploaded (e.g. Content rating).
Another of these dependencies that confused me is that even the closed alpha testing requires the app to have been published at least once. This means that you have to publish version 1.0 first, then you can use the alpha channel to push out updates quickly to your testers. As it takes up to a week (or longer…) to get the initial publishing through the system, this is a bit frustrating, as you really have to wait around for a few days before you can continue.
When you create an update, you need to remember to step the version code of the apk. This has to be done manually when configuring the export in Godot.
It is also worth mentioning that I did not opt-in to let google manage and protect my signing key. This means that I get warnings for not supporting bundles each time I try to publish, but these warnings can be ignored.
Next steps for me is to to publish to f-droid, and to provide some translations to be able to target more markets (right now the app is in Swedish, so I limited distribution to Sweden).
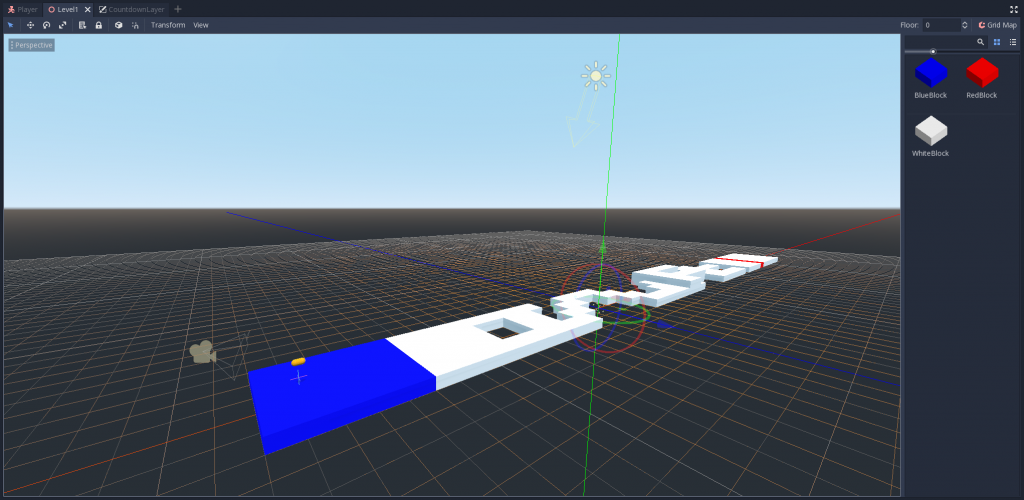
It is time for another installment of Godot (previous entries: introduction, 2D). This time, I have dived into the world of 3D. The goal is to recreate parts of an old time favorite: Kosmonaut. Something I remember playing a lot on my dad’s 286 with amazing EGA graphics.
The state of the game when writing can be seen in the short screen capture below. This is more of a tech demo status than a full game at the moment, but I hope you will still find it interesting. You can also get the complete source code.
The project is split into two major parts: the Player and the World. Each of these contain scripts that I will refer to below. But first I want to talk about how to create 3D scenes.
Of course every scene can be created manually from individual elements. However, in 2D games it is common to use tiles to create large worlds from common elements. Godot’s analog in the 3D world is the GridMap.
A grid map is more or less a 3D tile map. Inside each tile (or cell, or whatever you call them in 3D) you can place an item. The way you create these items in Godot is to place each 3D element in a scene and then convert it to a mesh library. Then you can draw your 3D scene much like you can draw a 2D scene from tiles.
Once we have a world with a track (the grid map), we add a player to the scene (the yellow blob in the image above – I need to learn Blender to create a proper ship). The player scene contains the ship – and the camera. This means that the camera follows the player automatically – very convenient.
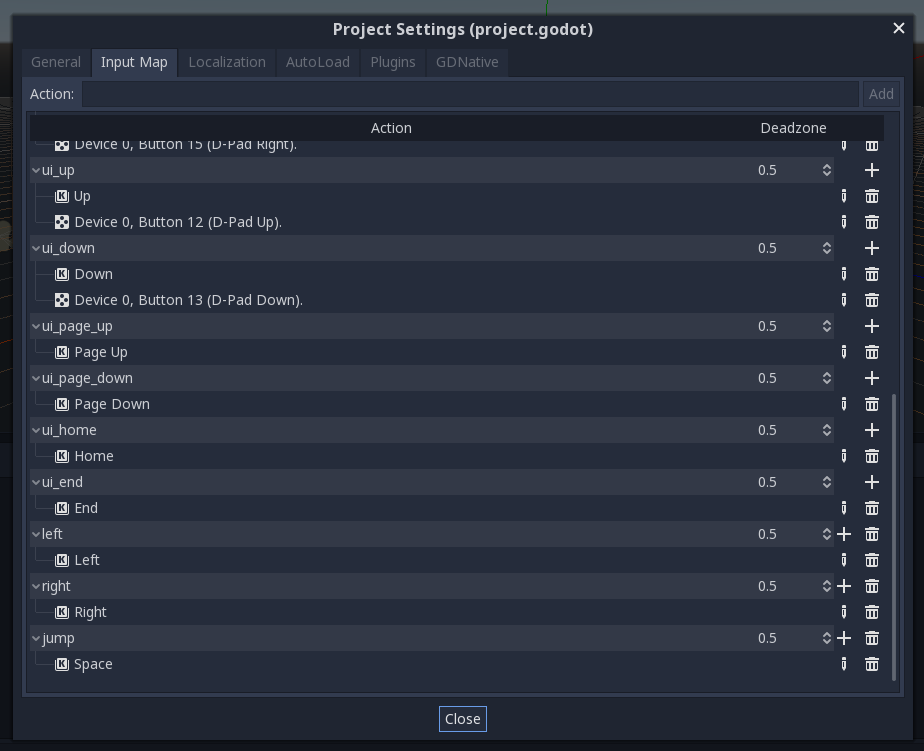
The player script is responsible for this ship’s movements based on user input. Inputs can either be pressed for a long time, used for sideways movement, or just tapped (i.e. the release is ignored), used for jumping. Each of the inputs are mapped to a keyboard key (or other input device) in the Project Settings dialog, under the Input Map tab. This feels a bit awkward to me and makes me lose the feeling of flow – but I don’t know how to do it better.
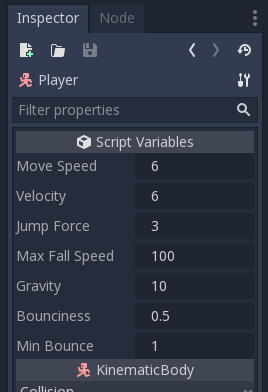
Getting gravity, jumping and bouncing to work was fun. It reminded me of coding games on my Atari ST. The character controller code is really basic, but can become super complex if one does not think through the order of the things you do. I ended up exporting some tunables so that they can be adjusted in the editor, just to figure out how high to jump and how fast to run the ship.
Figuring out crashes was easier than expected. Through the KinematicCollision objects retrieved using get_slide_collision, the normal of the surface collided with can be retrieved. From there on, it is easy to determine if the ship is sliding along a wall, or just hit it head on. The latter is deadly and the crash signal is emitted.
The crash signal leads to the world script. Here we handle the second death scenario – falling. This is a handled by the world, rather than the player, as the world knows what the lowest possible y value is.
The world also refers to two invisible scene elements used to mark the starting position ($StartPosition) and goal position ($GoalPosition). The first is used when resetting the player, while the latter is used to determine when the goal has been reached (duh).
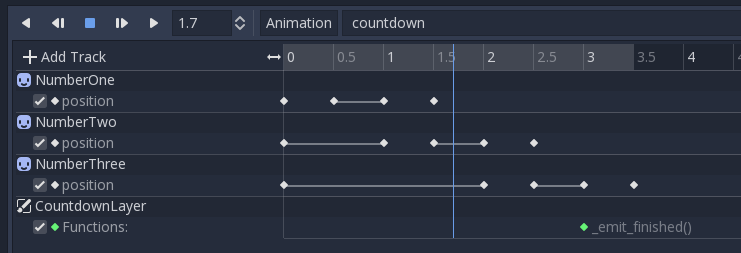
When starting a run – or restarting for the millionth time, and when completing a track, a short sequence is shown. These sequences are realized using a CanvasLayer, Sprites and an AnimationPlayer. The canvas layer allows us to add 2D contents on top of (and behind) a 3D (or 2D) scene. Each such layer is broken into a scene of its own that encapsulates one sequence. Each scene have a small script interface with a play function and a finished signal.
When showing a sequence from the main world script, the script is started and then the calling function yields until the finished signal is emitted, as exemplified here. Very convenient!
One more word about the sequences: the animation player is a really convenient way to control all properties of a scene using key frames. It can even be used to call functions. I really like this.
On a side note, I found my first Godot docs bug when writing this post. The pull request is right here ;-)
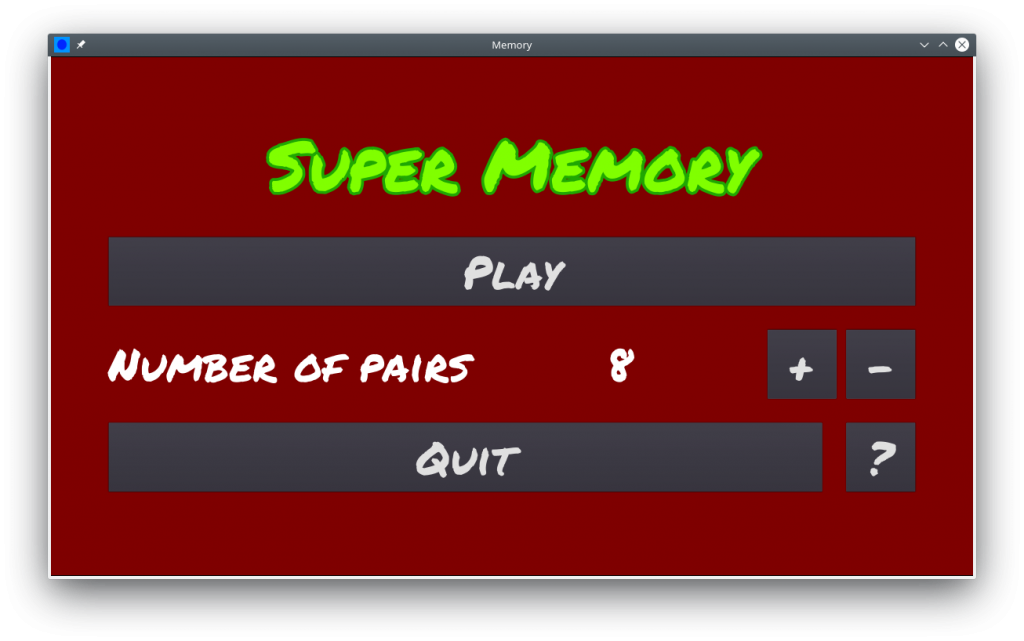
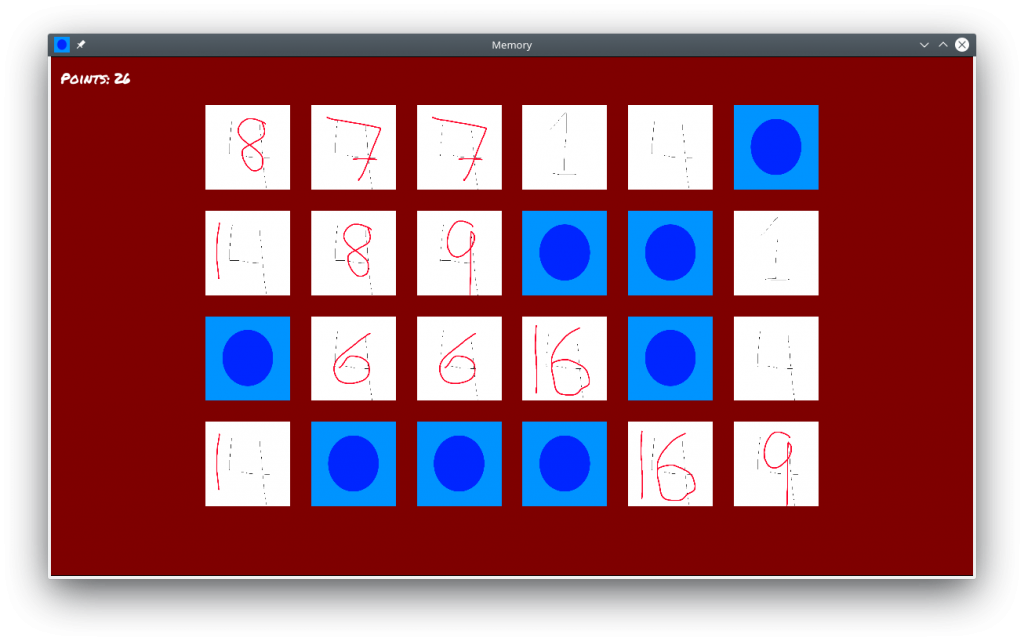
As mentioned, I’ve started using Godot to create some games with my kids. We decided to start with something simple, so we created Super Memory. I’m still waiting for a graphics delivery, so right now the you play with “dad’s placeholder cards”. They aren’t pretty – but they get the job done.
I had three major goals when creating this game:
Teaching the kids basic programming logic – how to think like a machine.
Teaching myself a bit about Godot.
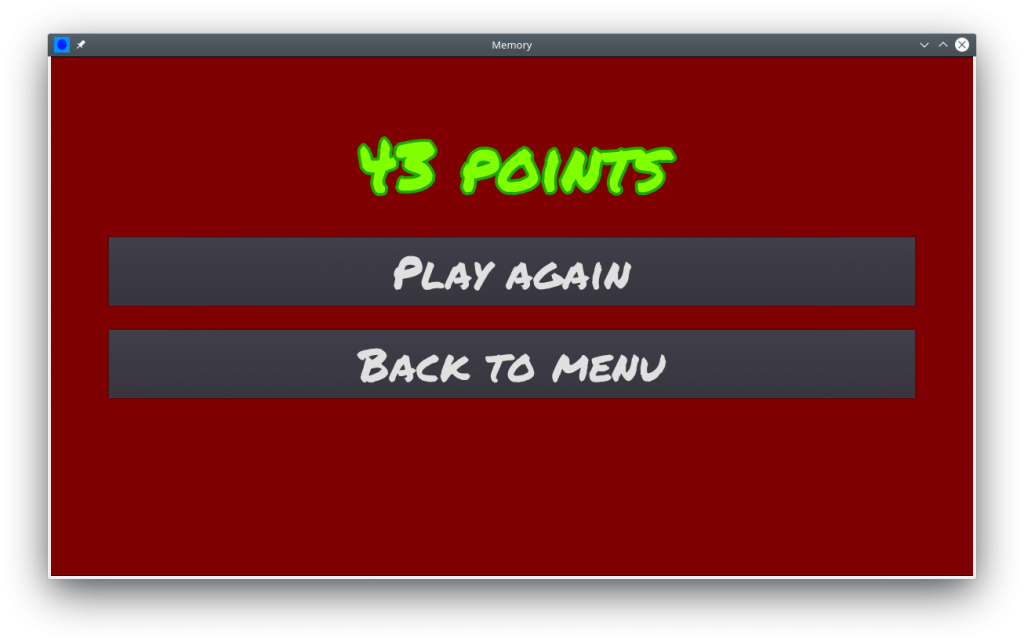
Creating a game that I can push all the way to Google Play.
The first two items are done – for the third I’m still waiting for the graphics delivery. Kids are such lazy team members ;-)
When it comes to the game logic, I decided to push it all into the entry point of the game: the table scene. The main parts are in the init_game function and the _on_card_flipped function. I would consider the rest of the code support functions, or GUI driving functions.
This brings me to the GUI parts. I’m still not convinced that I understand how to properly layout stuff using Godot, but at least it looks ok now – at the cost of some fixed element sizes and such. I need to spend some more time to really understand how the anchoring and stretching really works. I guess I have a hard time wrapping my head around it as the approach is different from what I’m used to from Qt.
Looking at the rest of the code, I’ve tried to make all the other scenes (in Godot, everything is a scene) like independent elements. For instance, the card scene has a face, and an is_flipped state. It can also signal when it is being flipped and clicked. Notice that the click results in a signal that goes to the table scene, which decides if the card needs to be flipped or not.
The same goes for the GUI parts. They simple signal what was clicked and the table scene reacts. There are some variables too, e.g. the number of pairs setting in the main menu, and the points in the views where that is visible.
All in all, the code is quite messy. I’m getting used to GDScript, so parts of the code has static typing information, while others don’t. Also, naming and underscore prefixing is a bit random. I’m also a bit unsure about the onready var pattern to hold references to various scene elements vs hard coding the reference. And one more thing – some parts are in Swedish before it all shifted to English.
At the moment, I have built installers for all desktop platforms and tried them. I’ve also setup an Android toolchain and pushed development builds to a couple of phones. This also works beautifully. Next step is to get the graphics delivery and push something to Google Play. I will keep you posted.
I guess it is quite common to start the path towards programming by making games. I started with a simple guess the number on my dad’s zx81 back in the day. He must have written most of it, but I felt proud of the result, so I will claim that it was mine.
I’ve experimented with various ways to get my kids into programming. Everything from board games, online resources, scratch, building shitty robots, and so on. They get it, but it is hard to move on from the basics to being able to start from a clean sheet of paper and create something.
During the summer, I decided to look into the various options and tried using Unity and Godot. After a couple of experiments, I settled on using Godot. Partly because of its open nature, but also because as a tool, it does the job I need it to do just as well as Unity.
From my perspective, Godot is interesting, as it is a tool that is based around a visual editor. You do write code, but you add the code to the visual model, and not the other way around. This is somewhat backwards to me, as I come from a Qt background, but I’m positively surprised over how well it works.
Another positive surprise to me is that Godot also comes with export presets. These are pre-built run-time environments for common targets such as Windows, Linux/X11, Android, iOS, HTML5. Using these, it is trivial to cross compile and distribute your project – from any platform, to any platform. Very convenient. You can even build your own export presets.
When it comes to the not-so-good, Godot comes with its own language, GDScript. It does the job, and I quite enjoy working it it. You can use VisalScript as well, or C# with external tooling – you can also use GDNative to interface with the engine using your language of choice, but that is less straight forward. I do understand that there is some history that explains the choices, but to me it does feel like Python, without the huge library of Python libs.
Next up, I’ll blog about some of the games I’ve made, so prepare yourself for boardgames, classic game remakes as well as my humble experiments into VR.